Measuring your space for a stair railing is a reasonably simple task, yet it still requires precision for your finished handrail to provide reliable support and optimal fall prevention. Knowledge of a few basic building code requirements and understanding what to measure will remove much of the stress that generally accompanies building or renovation projects. In this article, we’ll discuss the required measurements for residential and basic ADA-compliant handrails on stairs.
Elements to Measure
Regardless of the building type, proper handrail installation requires you to understand how to measure for length and height of the handrail. In addition, when installing a handrail that conforms to the Americans with Disabilities Act (ADA) guidelines, measuring the stair slope angle is also required.

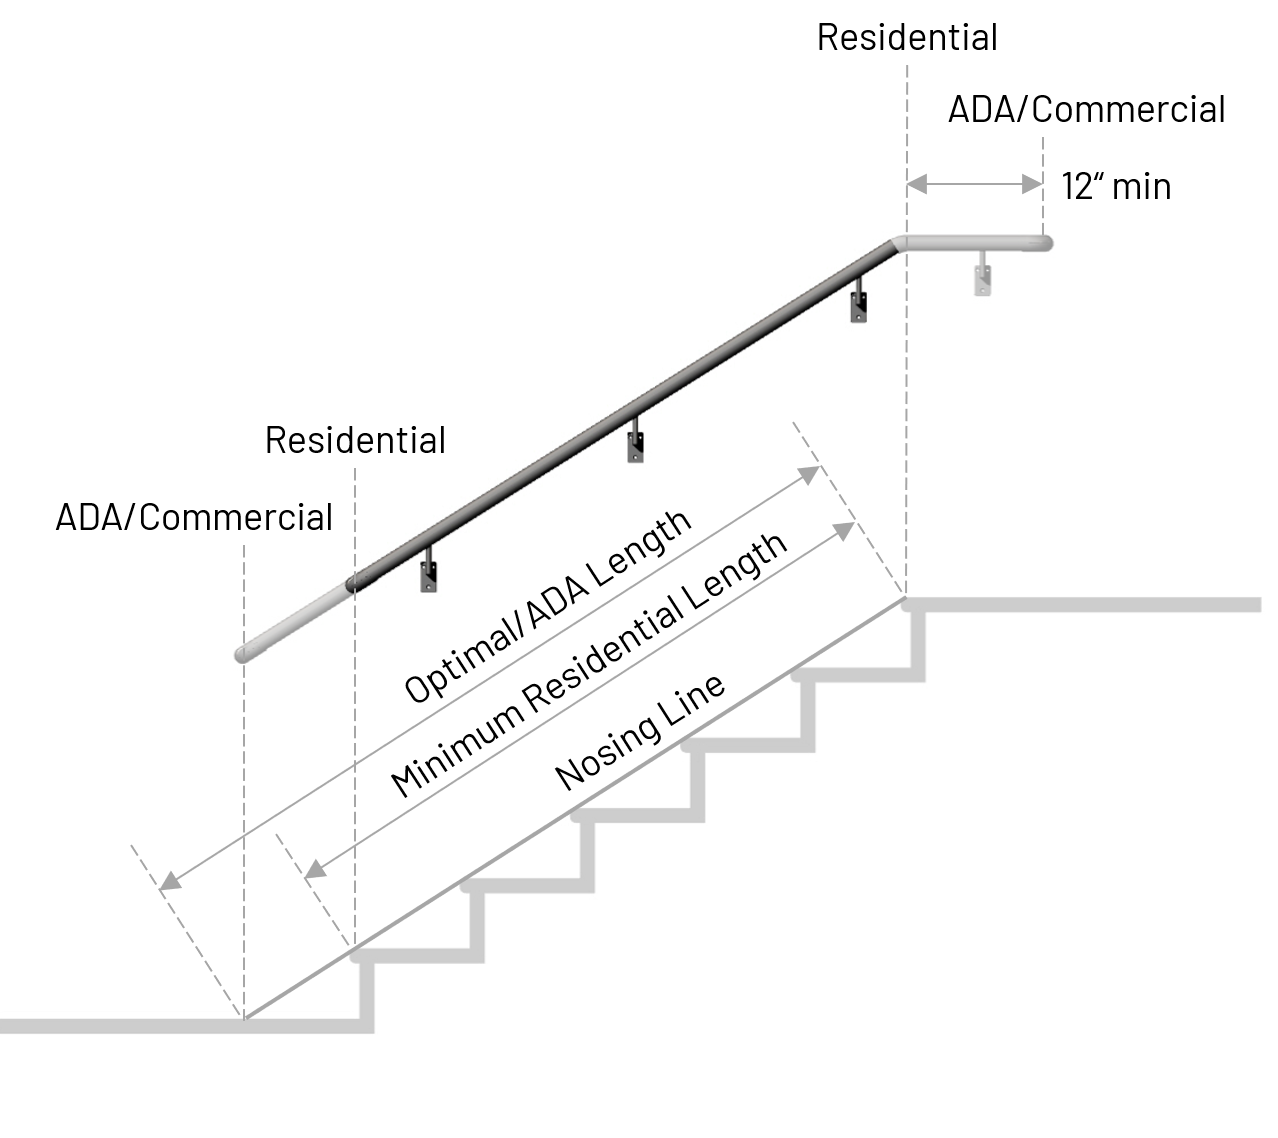
Measuring Handrail Length
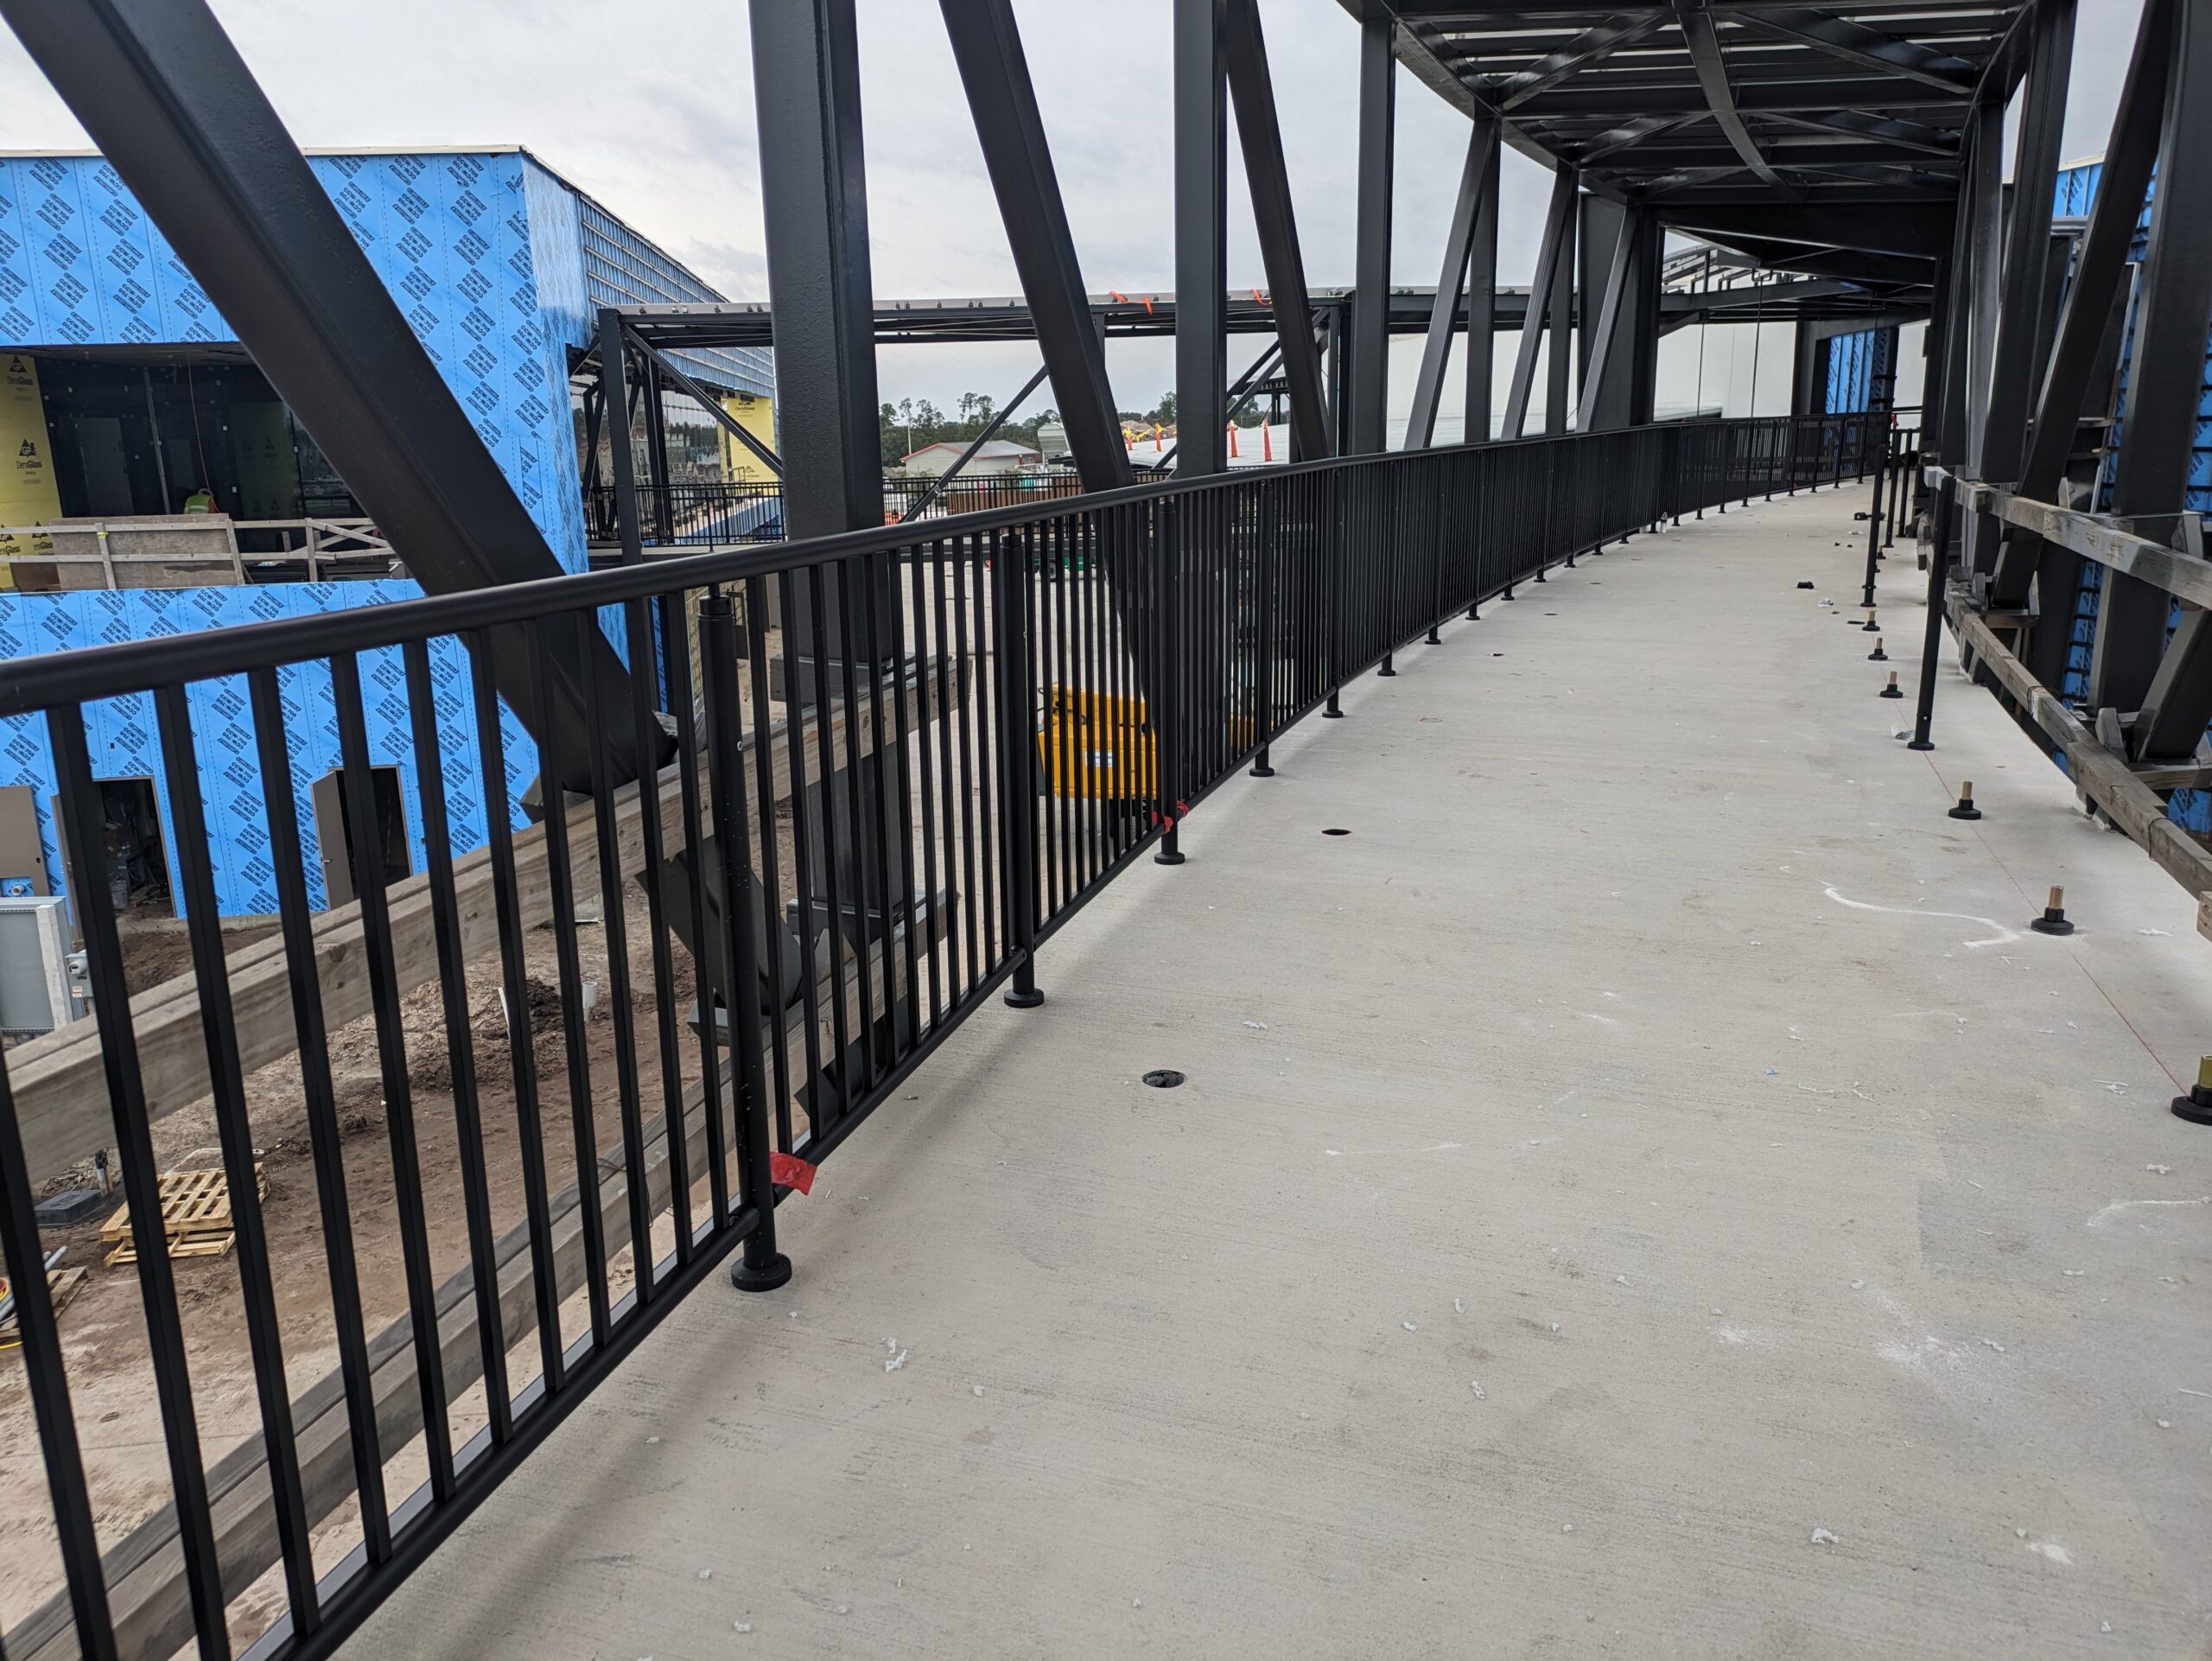
The length of the handrail’s sloped section is measured on a line running along the nosings of all steps. This line starts at the nosing of the top landing and runs to the floor at the lower end. This line is called the “nosing line.” ADA-compliant stair handrails, which are mandatory in commercial settings, must run the entire length of the nosing line. In addition, these regulations require a 12-inch horizontal section of railing at the top of the stairs, starting at a point directly above the upper nosing.
In residential settings, handrails must conform to some but not all elements of the ADA guidelines. In these settings, the railing must be continuous, starting at the nosing of the upper landing and extending at a minimum to the nosing of the lowest step or “riser.” In addition, for optimal safety, the handrail should run the entire length of the nosing line wherever possible.
Promenaid continuous handrails are designed to be ADA-compliant, making it safer and simpler to go where you need to go.
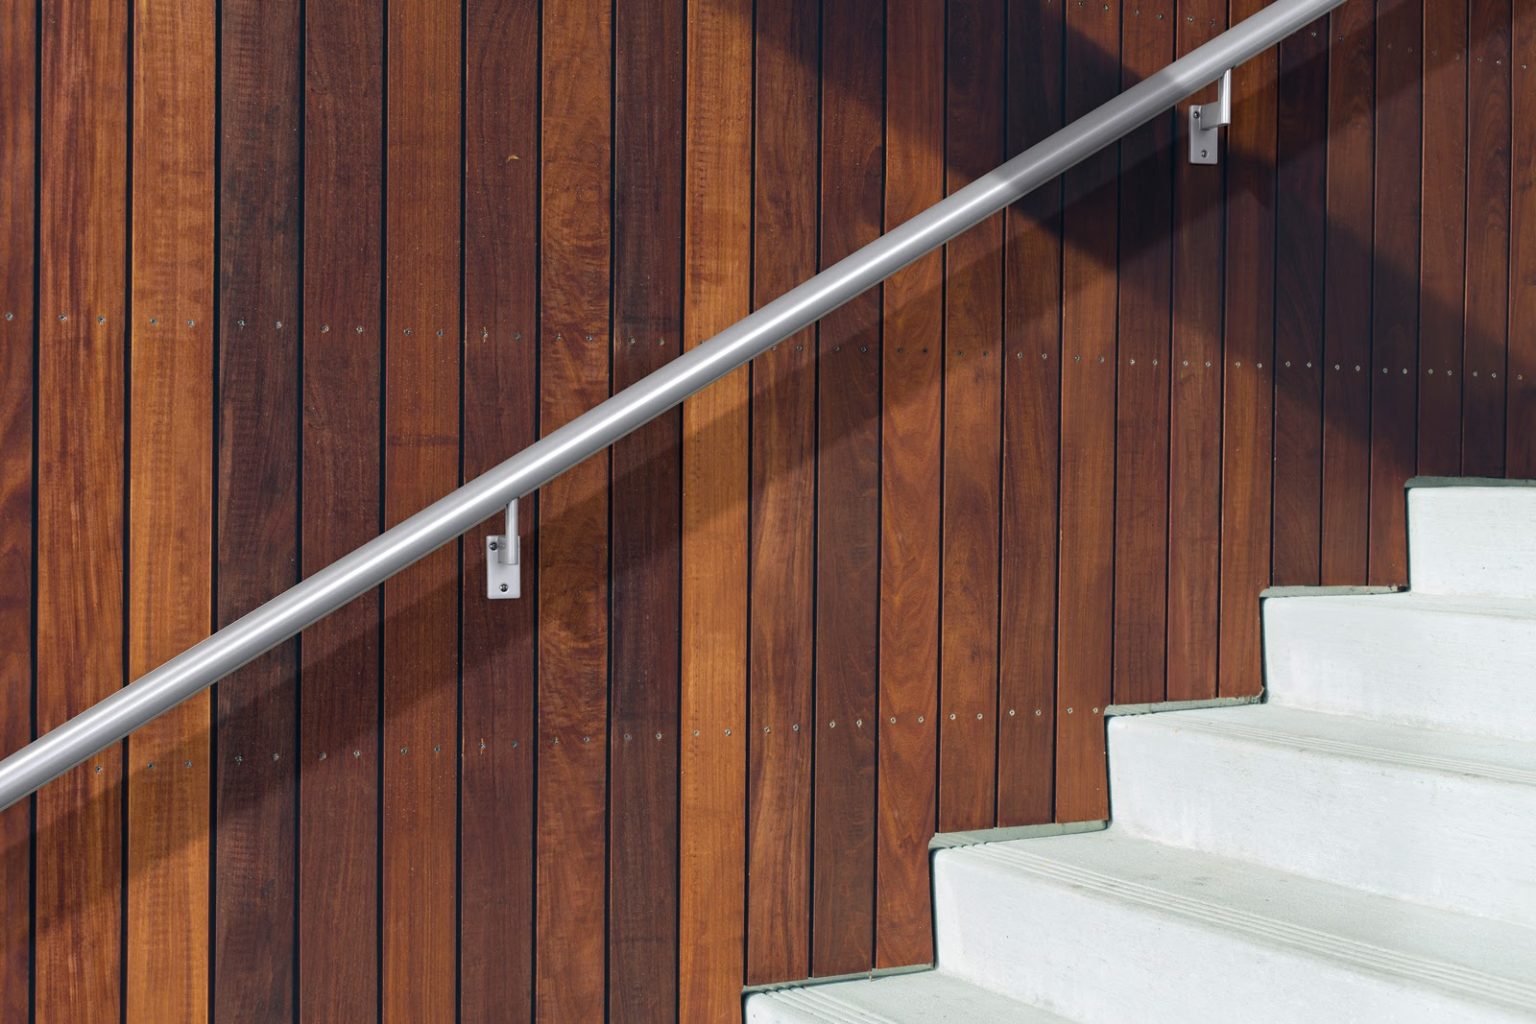
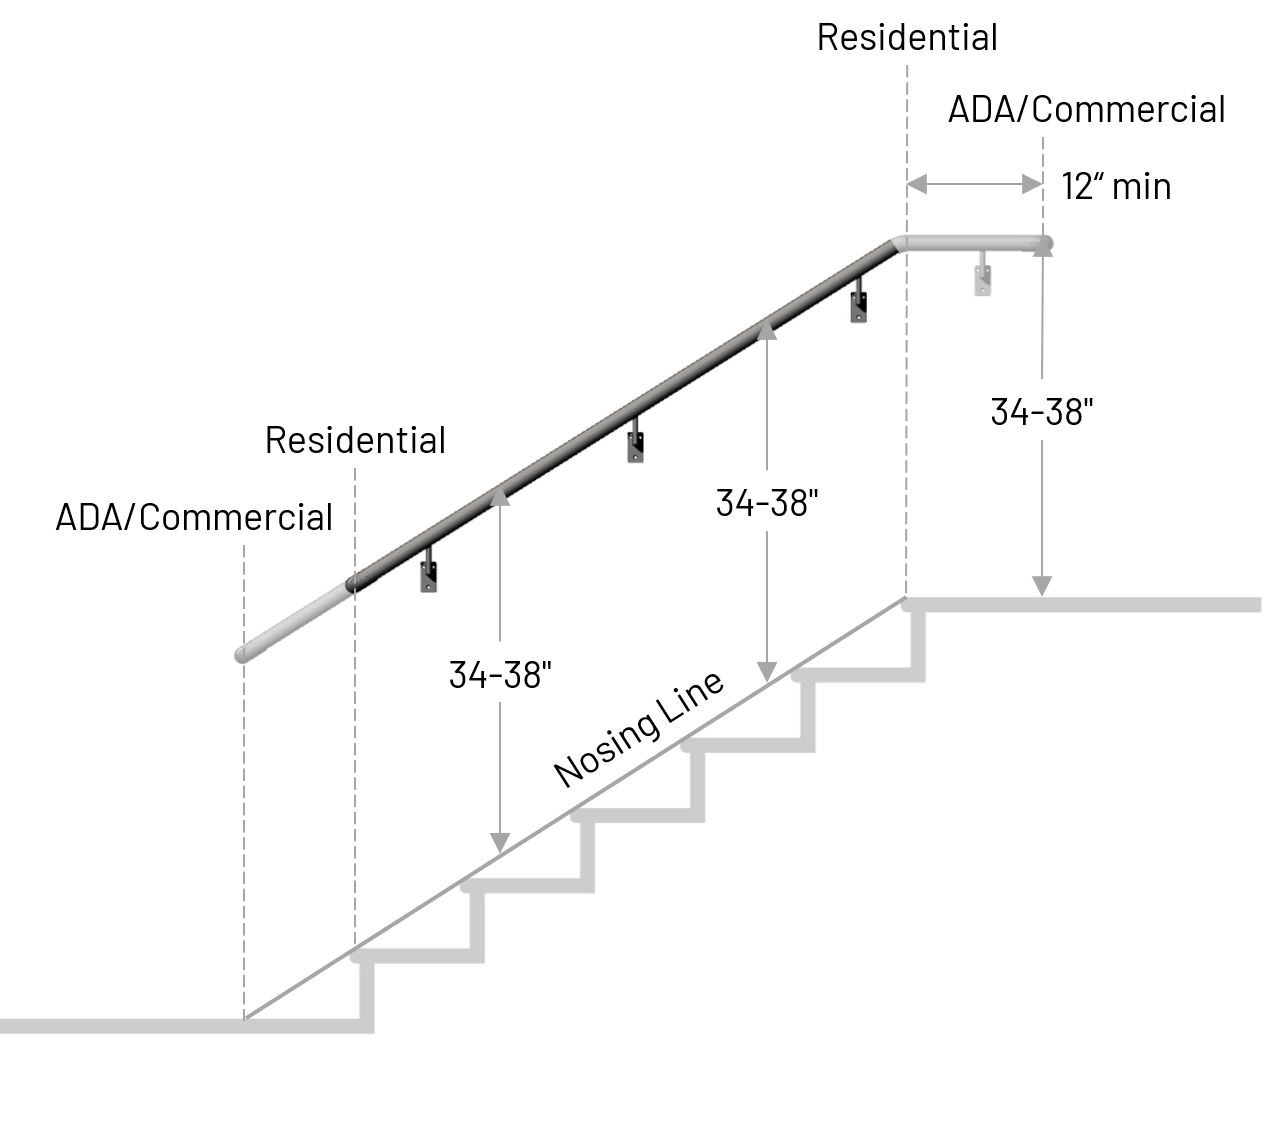
 Measuring Handrail Height
The top surface of the handrail should be between 34 and 38 inches above the floor or above the nosing line. Some installation guides suggest marking this height by measuring from the nosings of the steps. Because brackets should be fastened to studs or an equivalent solid structural member in the wall, it’s helpful to know where the nosing line is, since the studs are unlikely to line up precisely with the steps.
Note: In areas where children will be the primary handrail users, the maximum handrail height is 28 inches. If there is an adult handrail present, there should be a minimum of 9 inches of clearance between the two handrails.
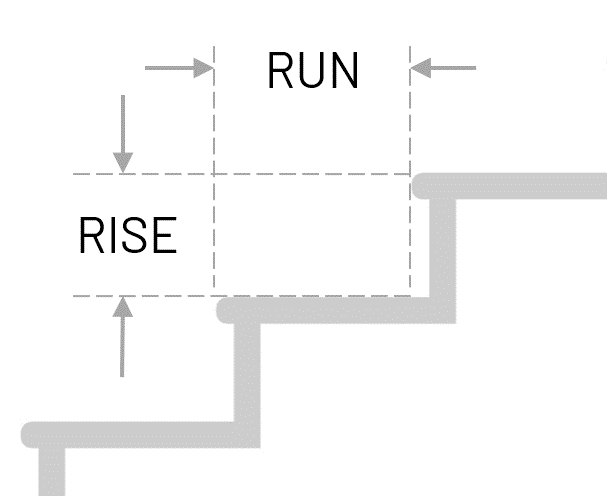
 Measuring for Stair Slope
Determining the stair slope is required to create the correct transition angle between the horizontal and sloped sections of an ADA-compliant handrail. If the slope is between 30 and 34 degrees, you should be able to use a standard 32-degree bend. If not, you may require a custom combination of bends or a Promenaid Universal Bend.
In order to calculate the slope of your stairs, measure the rise of the steps and the tread run. Then, you can simply use the table below to find the slope – also called stair pitch or angle of inclination – in degrees. Note that the angles where a standard 32-degree bend can be used are shown in grey.
A smartphone app can also be used to measure the stair slope. Position the long edge of your smartphone along the nosing line, or if a molding runs parallel to the stair slope, you can measure its angle instead. For ADA regulations for ramp handrails, check out this handy guide to ramp handrails.
How to Install a Handrail
Once you’ve measured your space, you’re ready to learn how to install a handrail. Promenaid handrails are uniquely simple to install. Our handrails and grab bars are highly versatile and can be adapted to fit almost any space. Available in a variety of colors, our Endura™ anodized aluminum handrails are scratch and chip resistant, ensuring that your railings look their best for years to come.
For a traditional railing look, check out our TrueWood™ handrails. These classic handrails are made with a sturdy aluminum core wrapped in real wood. Requiring 50 times less hardwood to manufacture than traditional wood railings, our TrueWood™ handrails are highly durable and deliver the same level of strength as our aluminum-finished railings.
We offer a selection of how-to videos for every aspect of installing our innovative railings. Our documents page and blog are also excellent resources during the handrail installation process. If you run into an issue that isn’t covered by these resources, our team of experts is always available to answer questions and assist you.
Still unsure about how to measure for your project? Contact us at Promenaid and talk to an expert. We’ll help you design the perfect handrail for your home, business or your customer-beautiful, code-compliant, easy to install and delivered in as little as 24 hours. Our handrails can also be purchased through local dealers. (Find a dealer near you with our convenient search tool.) Whether you’re shopping for a kit or a handrail component, Promenaid is here for all of your handrail installation needs.
Stay tuned to this space for more handrail-measuring content!