
The most important factor in handrail installation is obviously attaching the handrail to the wall. However, it’s not as simple as just finding a stud and screwing the brackets into it. Handrail height, weight requirements, and ease of bracket installation are also factors.
These 9 tips for handrail bracket spacing and installation will help make the process easier.
1. Know the Maximum Recommended Weight Requirements
Handrails must be able to support the weight of those traveling up and down a stairway or along a ramp. The International Building Code (IBC) and the International Residential Code (IRC) require that a handrail or guard be able to withstand a concentrated load of 200 pounds applied in a downward direction within two inches of the top edge of the top rail.
2. Measure Stud Spacing for Wall Installation
Standard studs are spaced 16” on center. Meaning that the measurement from the center of one stud to the center of the next stud is 16”. It is, however, important to check for studs using a stud finder to confirm their location along the wall. Measuring and marking the studs prior to installation will make the process much smoother.

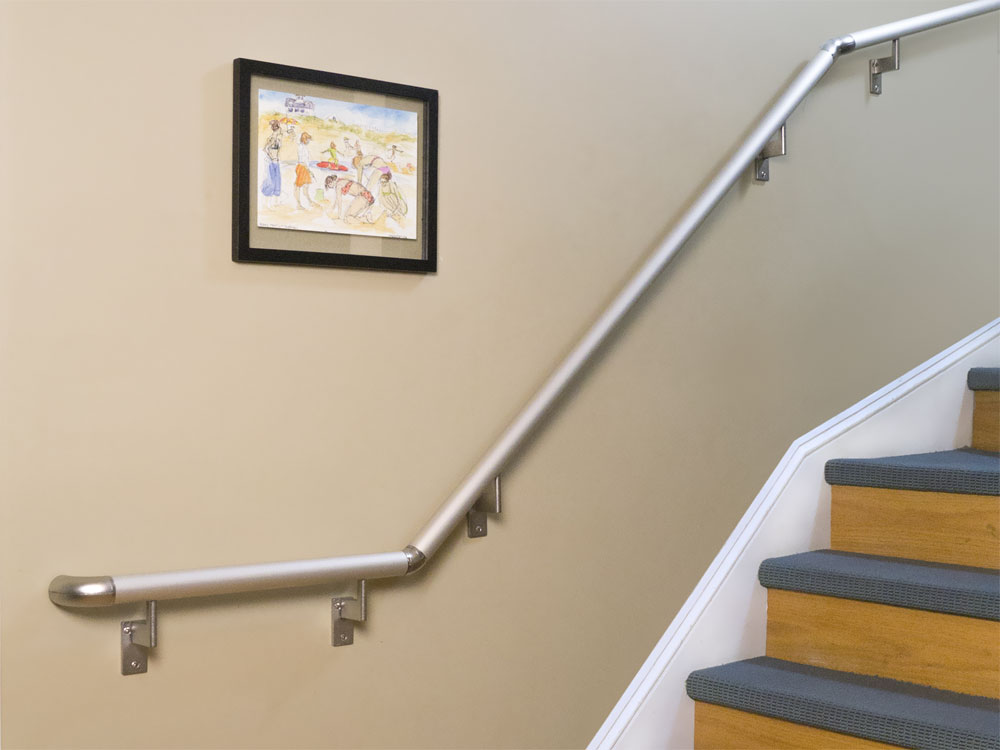
3. Properly Measure for the Height of the Handrail
Handrails, according to the IBC, IRC, and ADA must be installed between 34” and 38” above the stairs or walking surface of a ramp, walkway, or hallway. On stairs, this distance is measured from the nose of the stair tread.
Handrails must be at a consistent height for the length of the handrail. The easiest way to measure for handrail height is to measure the height at the beginning and end of the stairway or walking surface and then snap a chalk line between the two points. You could also measure from each of the stair treads or at points along the walking surface to ensure that the handrail will remain at a consistent height.
4. Install Brackets on Each End
Once you’re ready to install brackets on the handrail, it is best to install one at each end first. Once the brackets are in place, you can measure the remaining stair handrail bracket spacing and mark it on the handrail.
5. Consider How the Brackets Attach to the Railing
Understanding how brackets will attach to the railing is important as you prepare to install your handrail. Wood and stainless steel handrails require the brackets to be screwed directly into the handrail. The screws that are used to attach the bracket to the handrail are generally short, so that they don’t crack the wood or protrude from the top of the handrail. These short screws mean that the bracket isn’t attached as securely as it could be, and as screws loosen over time, the handrail can become unstable.
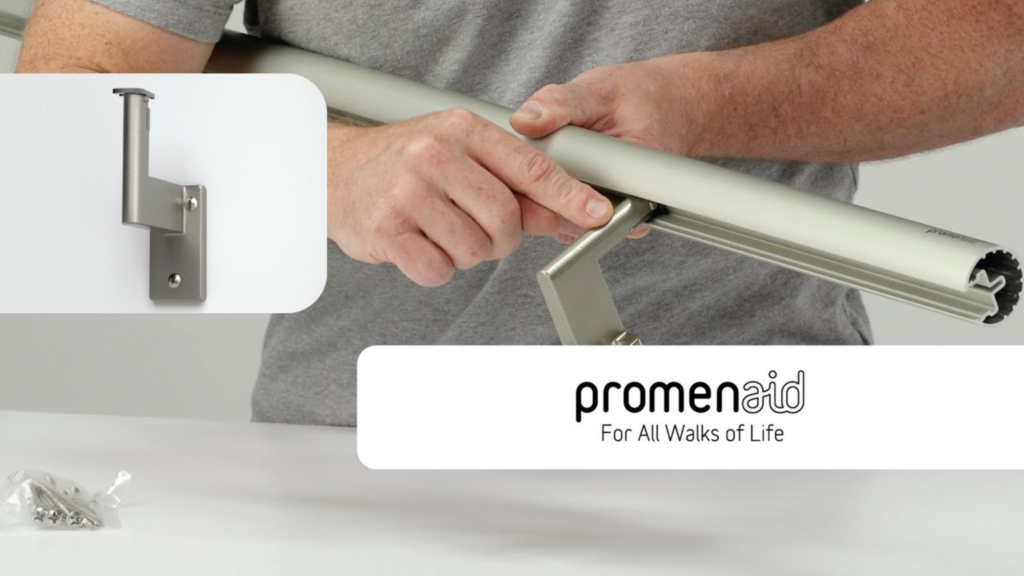
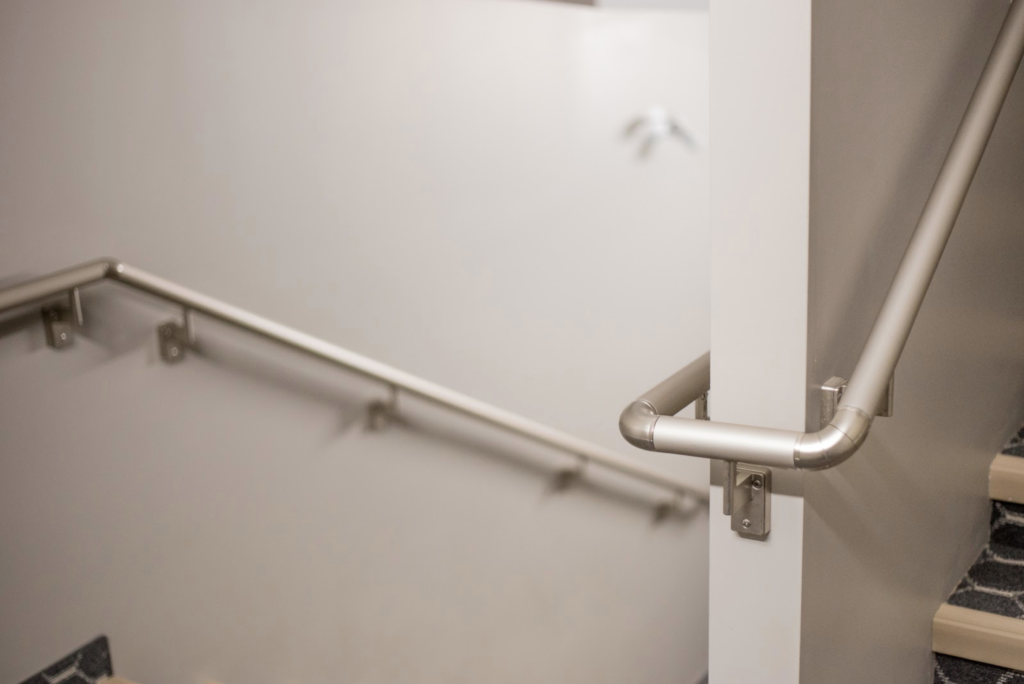
Promenaid handrails are built with a continuous channel that allows you to easily secure at the stud by positioning brackets wherever they are needed. You can also pivot the brackets to match the studs at a required angle to create a more secure connection.
6. Consider How the Brackets Attach to the Wall (or Structure)
The following questions will help you better understand how securely the brackets will attach to the wall.
What size screw does the bracket allow?
When you’re installing a handrail, it’s important to consider the size of the screw that will be secured in the stud. Most brackets from hardware retailers require small screws that are too short and too narrow to be securely embedded into the stud. At Promenaid, we use a 2-½” long #12 screw to ensure that the handrail will be securely attached to the wall or structure.
How many screws?
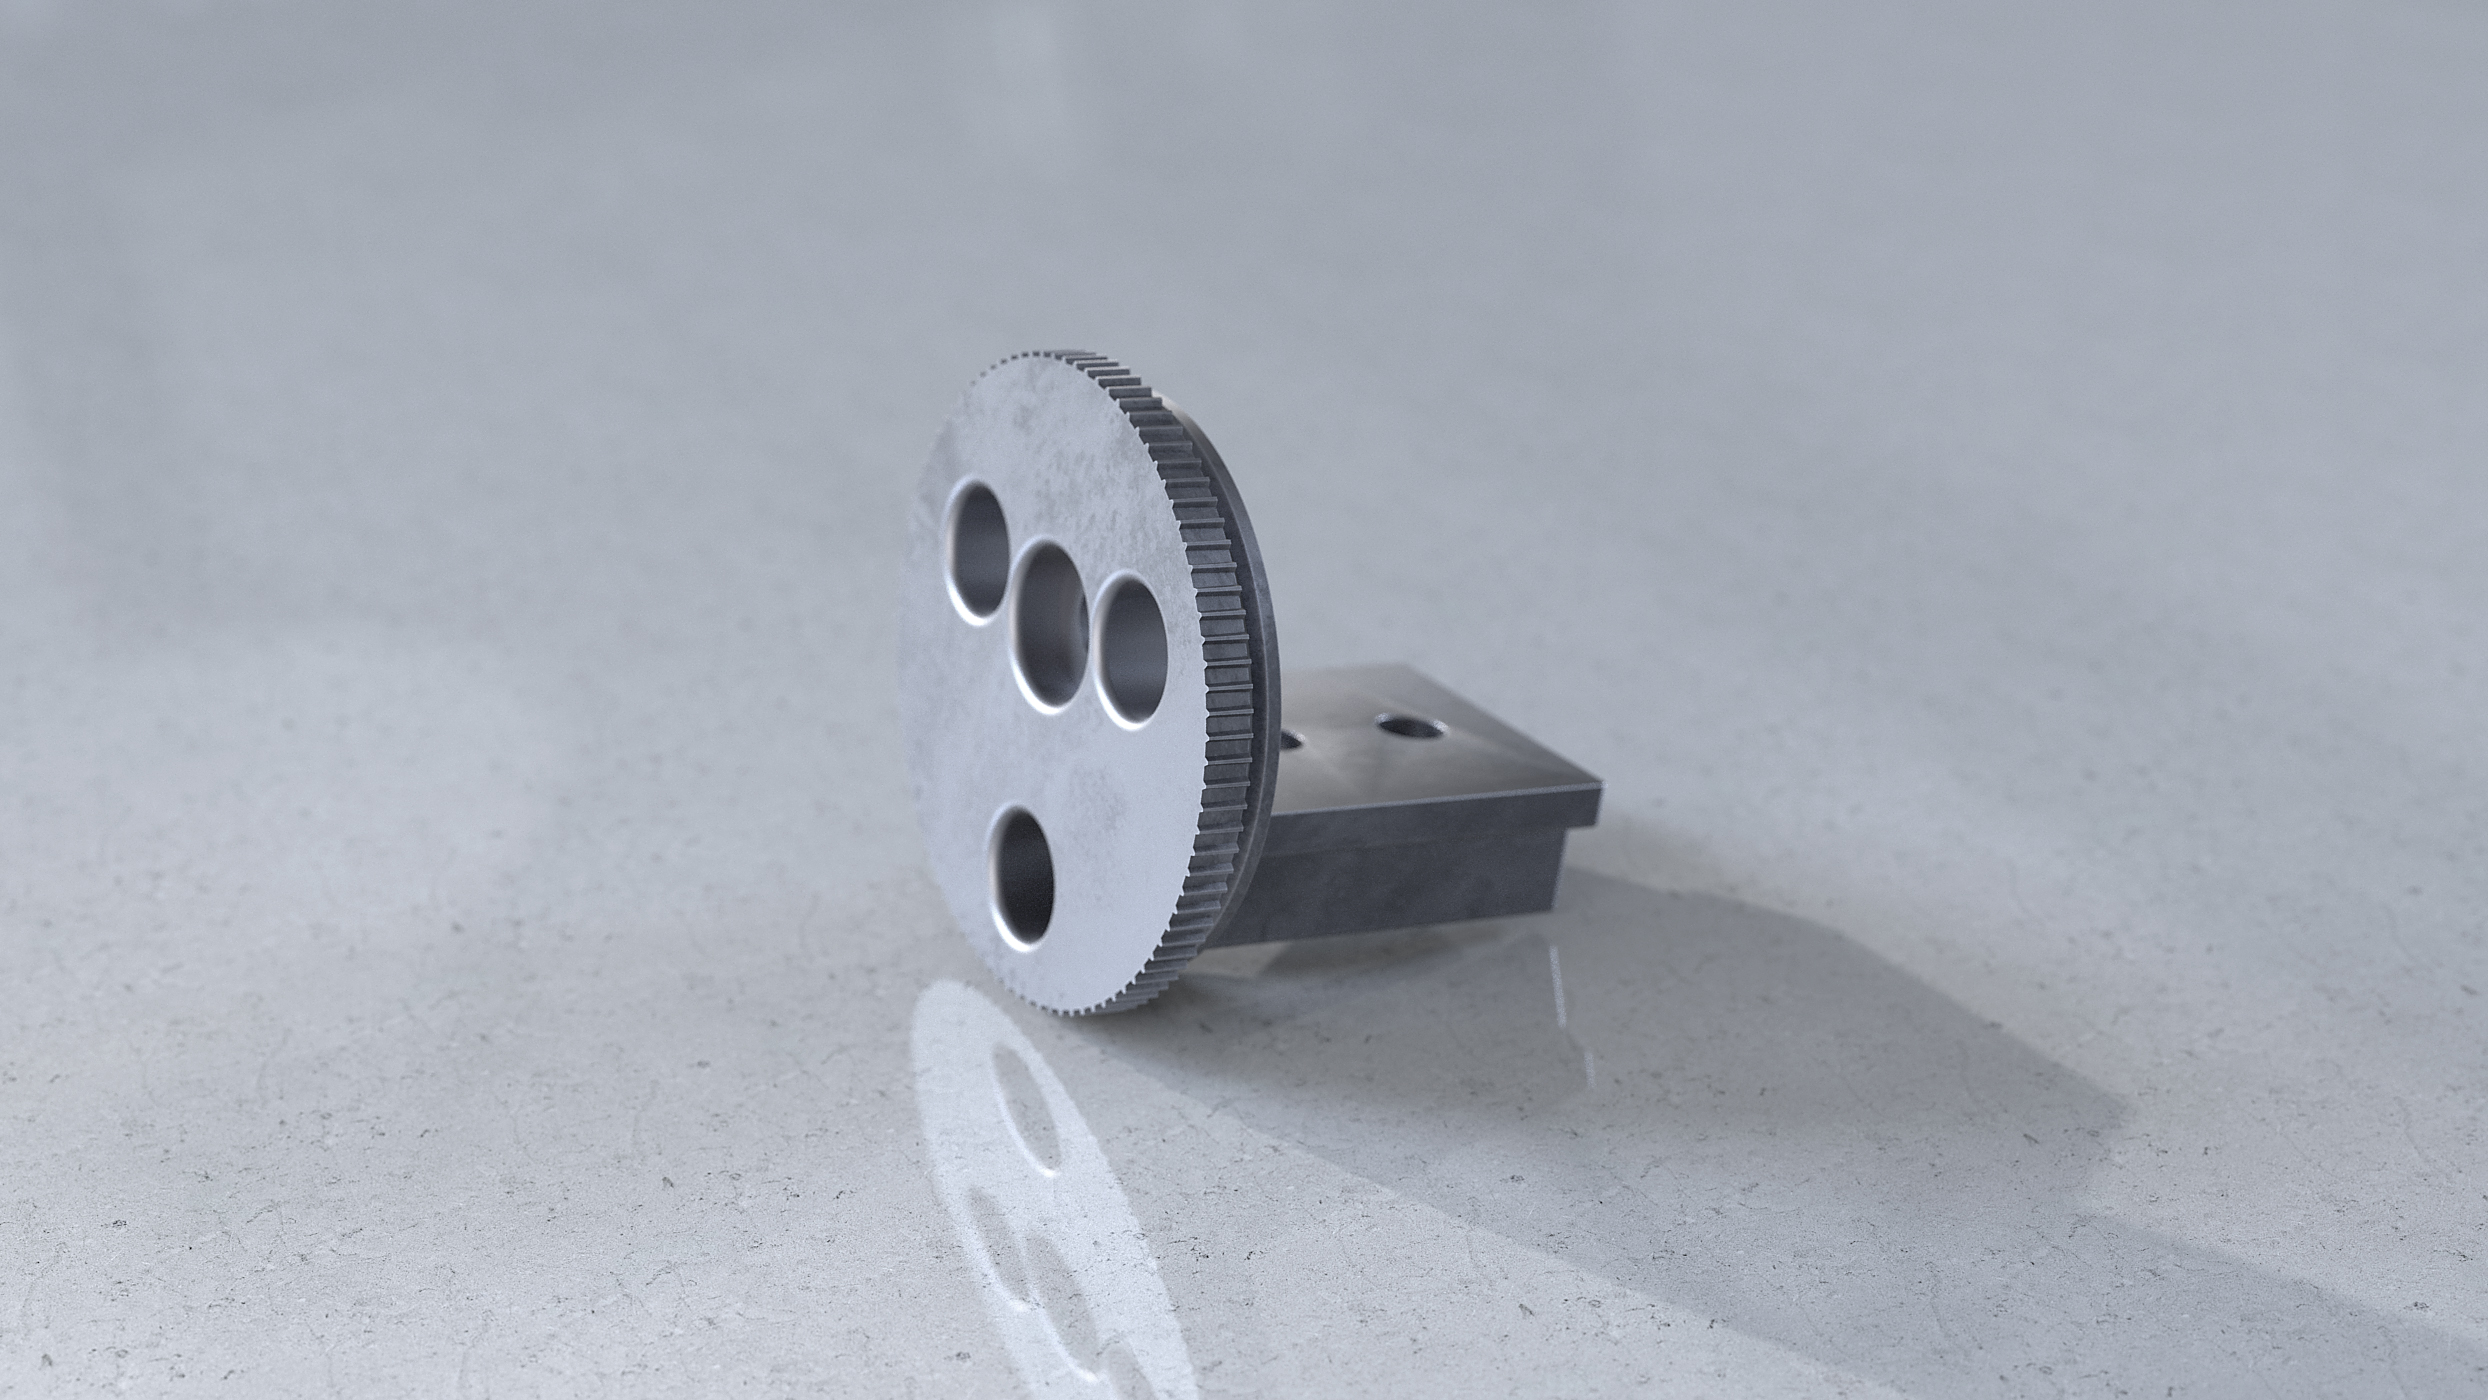
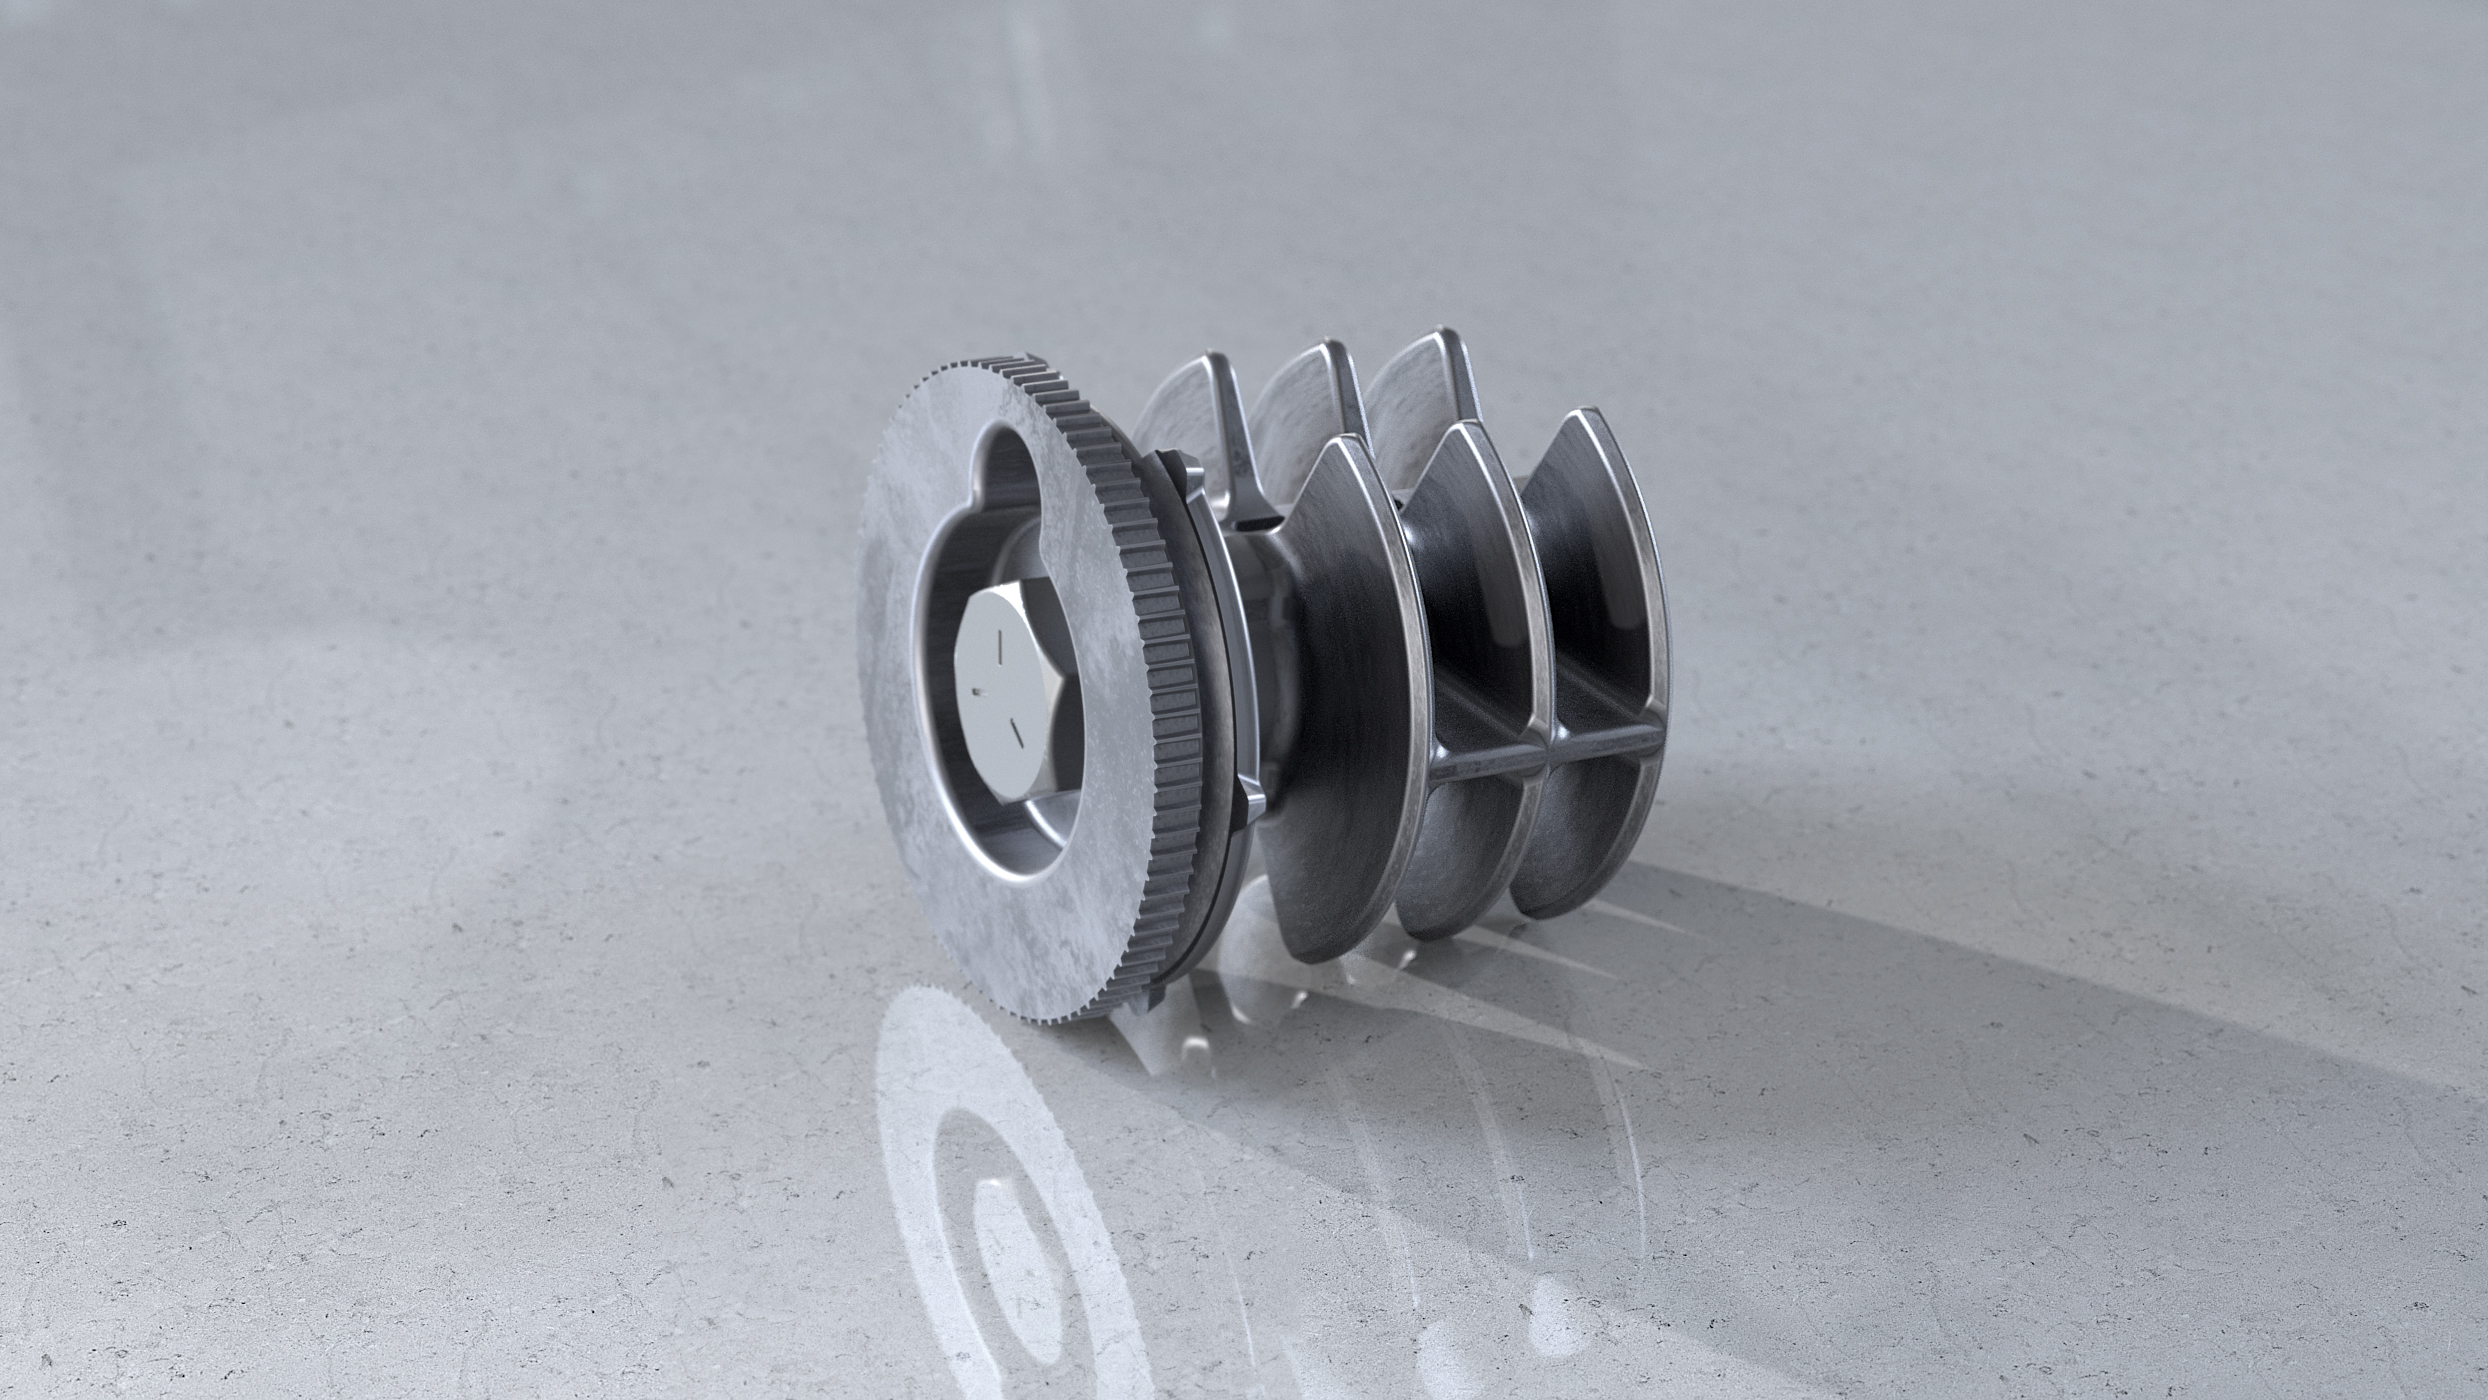
Some brackets only allow for two screws. Promenaid provides for three screws in our pivoting bracket or one substantial bolt in our Sprocketlock bracket. Both create an incredibly secure bracket for wall attachment.

What if there’s no stud?
A stud is a crucial component that maintains the integrity of a handrail, which is why Promenaid brackets must be attached to either studs, masonry, or an equivalent wall structure.
However, there are a few possible exceptions:
Decoration
Attaching a handrail to drywall may be acceptable if a bracket is purely—and only— being used for decorative purposes (i.e. installed to create symmetry where sufficient brackets attached to wall structure already exist.)
In this situation, Promenaid recommends Triple-Grip wall anchors with pivoting brackets, or toggle screws with Sprocketlock brackets.
Reinforced Drywall
It is possible to install handrail brackets with proper spacing on reinforced drywall, but only if the drywall is doubled or tripled and the number of brackets is increased to provide the equivalent strength to that of an installation on traditional studs.
For this situation we recommend Promenaid Sprocketlock brackets, or Promenaid Wall Adapters with pivoting brackets. Either option will allow you to use heavy-duty Snaptoggle-type bolts or Moen SecureMount anchors to attach to the reinforced drywall, because the fasteners are hidden in the final installation.
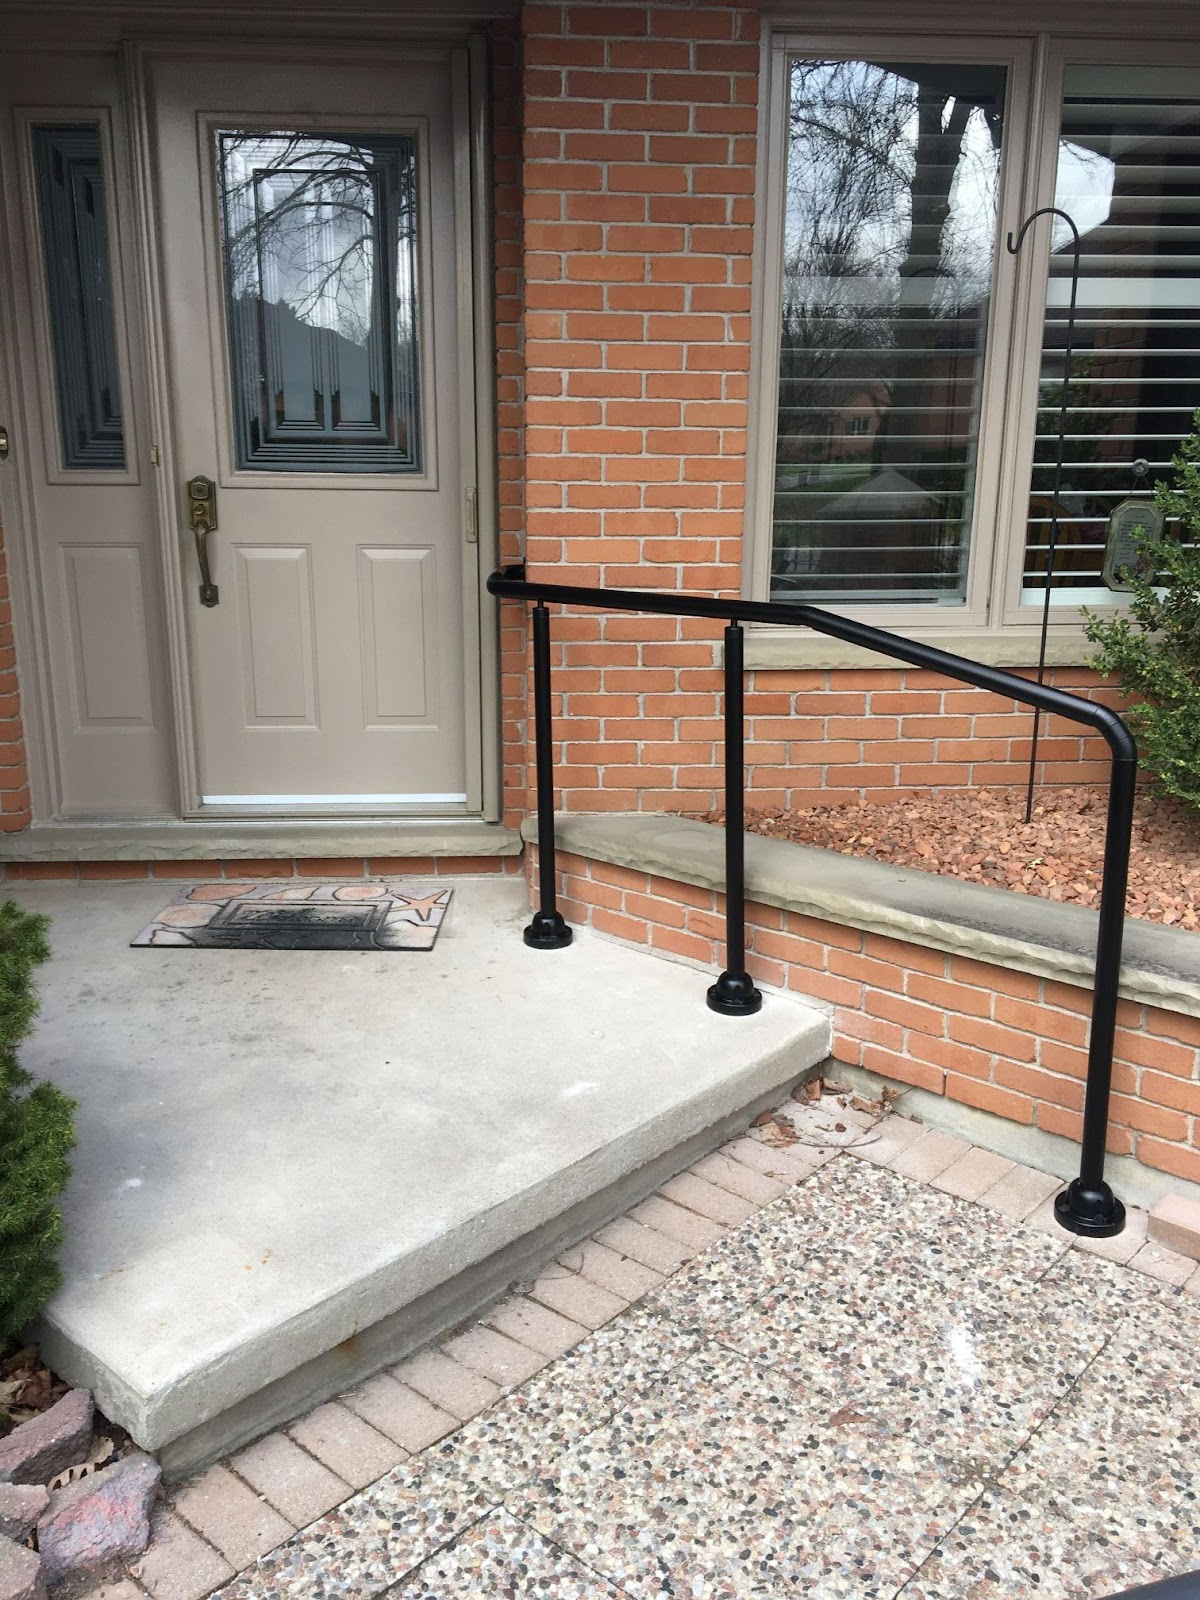
7. Can They Attach to Other Surfaces? Brick? Cinderblock?
Screws must fix securely to wood studs, concrete, brick, or other structural members. Substitute concrete screws or use appropriate wall anchors when attaching to masonry.
Here’s what you will need for each surface:
Wood, Brick, Concrete, or Other
When installing handrails onto wood, brick, or concrete, it’s important to use screws that strongly secure the handrail bracket into place.
Masonry
When installing a handrail bracket into masonry, you should use substitute masonry screws or appropriate wall anchors to provide supportive integrity.
8. Do They Allow for Unimpeded Passage of the Hand?
The IBC and IRC both require that handrails be continuous for the length of the stairway or ramp. The ADA standards go a step further to say that the handrail gripping surface must be continuous along their length and cannot be obstructed along their tops or sides, and the bottoms of handrail gripping surfaces cannot be obstructed for more than 20 percent of their length. The brackets that you choose for your handrail should meet these requirements.
9. Research Manufacturers Guidelines
When in doubt, research the manufacturers guidelines to get answers to specific questions, and if necessary, or a unique situation.
Choose Brackets That Allow for Flexible Pivoting and Positioning and Hit a Stud Every Time
Positioning brackets along the handrail requires precise measurement. What if you could use brackets that allowed for flexible positioning? Promenaid pivoting brackets twist and lock into place rather than needing to be screwed directly to the handrail. That way, if you mis-measure or need to reposition the bracket for any reason, you simply twist it to unlock, remove the bracket, reposition it in the extruded channel, and lock it back into place.
The bracket itself also pivots, allowing you to install the handrail at the perfect angle without making sure you get the screws just right. This ability to pivot or be repositioned means that you will be able to hit a stud every time. Plus, even though Promenaid brackets allow for three screws, they still support 500 lbs. of force even if only two screws can attach to the stud.
Promenaid Sprocketlock brackets require only one heavy-duty fastener to attach to the stud or masonry wall. The brackets can be slid and repositioned anywhere along the railing. Tightening two small screws on the underside of the bracket clamps it securely in place in its final position, and hides the large wall fastener from view.
Contact Promenaid today to find the perfect handrail that will hit a stud every time!